Updated: Aug. 24th, 2022
This is a quick guide to the softwares used with the PCBs we sell. Please note that I am giving you the exact steps that make it work for me. However, it is possible that some people will have problems. Please email tx@txkeyboard.com with Subject: TX software problem, to consult with our KR team.
Click on one of the titles below to expand the guide.
1/ LDN software (for suo LDN PCBs that are included with TX-60/65 PC)
- Download here
- Change language (if necessary)

- Check if your PCB is recognized:

- Backlighting change (just click any mode, the change is real time). Right under the mode is speed of the lighting (more left = faster)

- Remapping by clicking any key

- Setting up layer triggers
I first set the R_Win key on my TX-60 as the key to access Layer 1:

On the trigger layer, I set L_Alt of Layer 1 to go back to Layer0:

Once that is done, you can hit R_Win to access Layer1 and hit L_Alt to go back to Layer0.
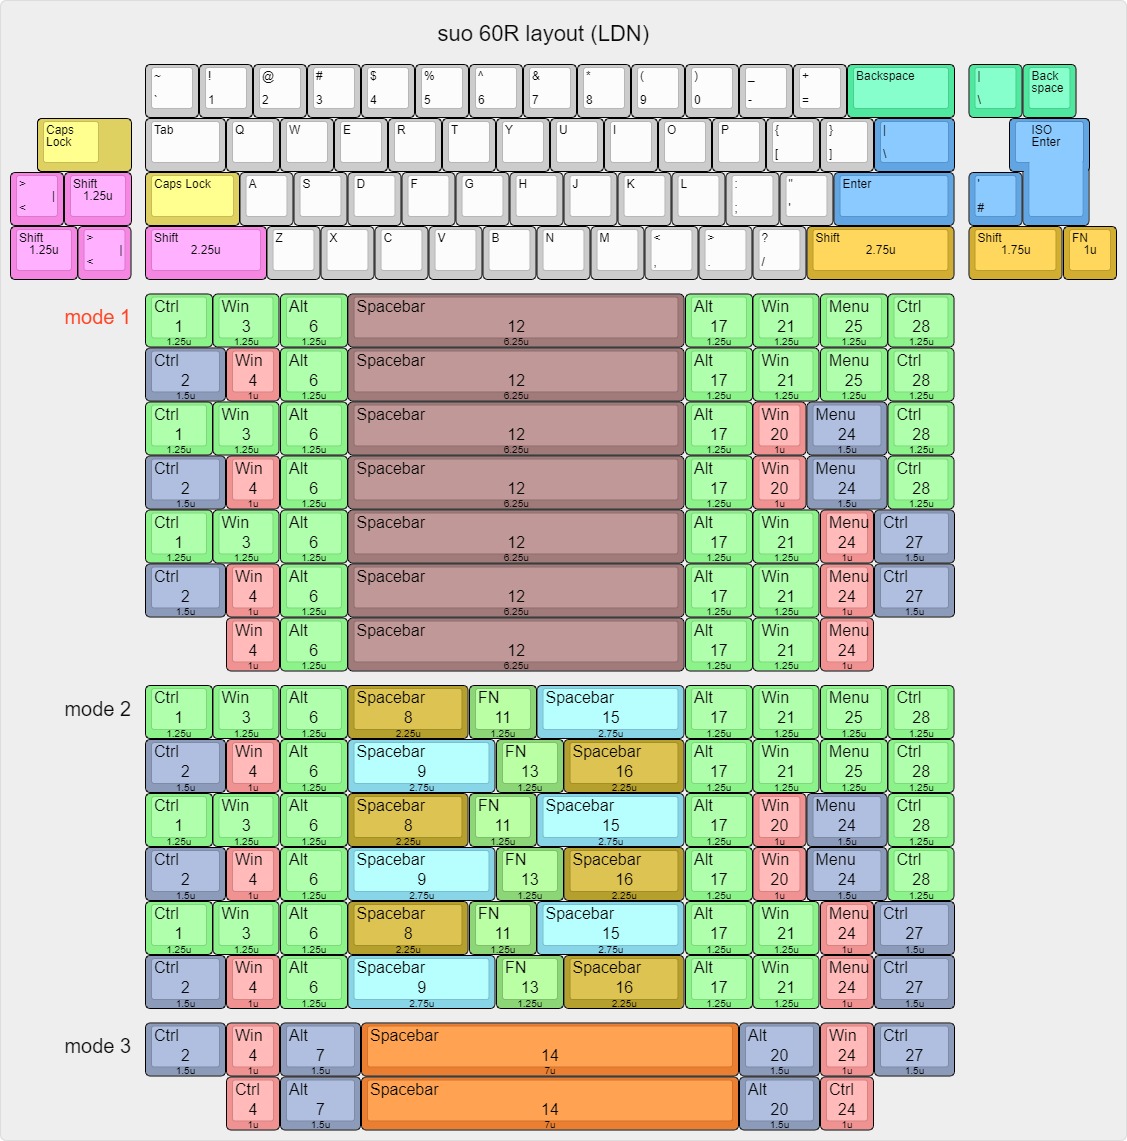
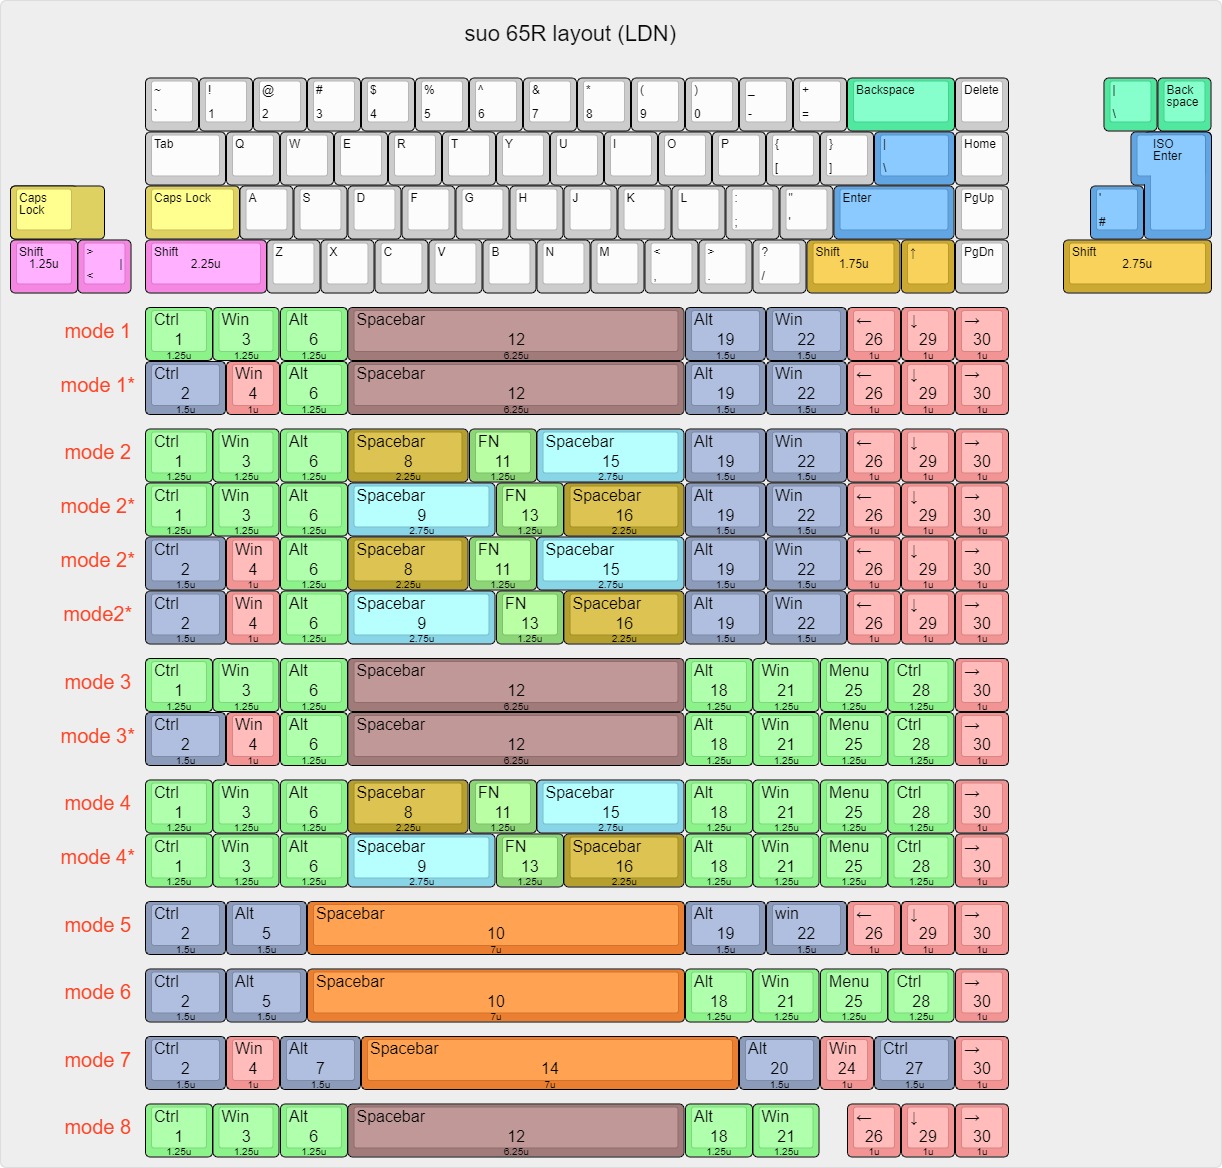
- Check supported layout below
- Turning off the FN key (usually mapped to "RW"):

- The "RW" key should come back to be the right winkey or whatever you mapped it to.
We will continue to update this...
suo PCB is likely to be used for these boards: TX-75v2, TX-87se, TX-84/87v2, TX-108se, EO-87, etc.
2a/ suo TX Software:
- Software releases:
- v2.2
- v2.3
- v3.6
- v4.1 and update with this firmware
- v4.5 x32
- v4.5 x64
- v4.6 x86 x64 and update with the current firmware
- v5.0
- v5.1 x32 x64
- After downloading, extract it as a folder on your desktop.
- Run TX_Device.exe from there. If somehow nothing happens when you double click it, go to the taskbar and check on the right because sometimes it will automatically minimize itself.

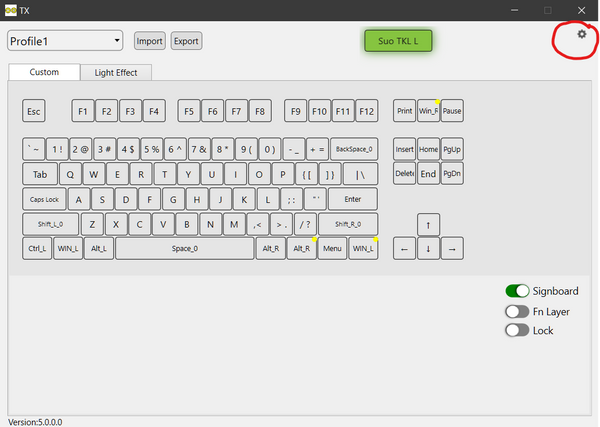
- When you get to the software, it looks like this and your board should be recognized automatically:

- Click the layout and the keymap should show up:

- In this example, I change the Menu key to Fn key. Right click the Menu key, choose FN then hit the Apply button:

- I then turn on FN layer and edit key "1" and "2" into Volume Up and Volume Down. Do the same as the previous step. Right click the key, choose Multi media tab, choose Volume Up or down then hit Apply.

From now on, whenever you do a combo key: "Fn + 1" then your volume will go up.
- Layout change: Right-click on your enter to ISO enter for example.
- Light effects:
- Global Lighting and Custom effects are for your in-switch LEDs
- RGB Round is for your side LEDs
- LOGO effect is for your TX Logo LED above the arrow keys.
- NSC mode: if you want to LED to turn on ONLY when you press the indicator (Capslock) then turn on this mode.
- Reset: If you want to quickly reset your PCB, hit the cog icon on the top right and choose reset.
2b/ How to update firmware:
i. Hit the cog icon on the TX software.
ii. Click the Update tab

iii. Hit Launch

iv. The software should close itself and the Update Tool shows up. Choose the Device name that was recognized by the software on the first screeenshot. In this case, it is suo TKL L. Click Select file to choose the correct firmware to update. In this case, it is suo 87L.

v. Let it do its thing...then hit Finish.

vi. Open the TX software again. Hit cog icon then Reset > Reset. Go back to mapping your board normally.
3/ Leeku PCBs: L3 Tools or JigOn
All the infos can be found on KBDLab. We are no longer provide support for Leeku PCBs due to years of no development.